
The security checkpoint is where most of the stress in air travel tends to build up. There's a line you can't predict, an officer asking you to move faster, a bin that won't fit your bag, and a quiet worry that something you packed will set off an alarm. Knowing what happens at airport security ahead of time takes most of that tension away. The process follows the same basic order at nearly every US airport, and once you understand each step, it stops feeling like a test you might fail.
This guide walks through the full airport security screening process as it works today, including the recent changes to shoes, ID requirements, and scanners that still confuse a lot of travelers. If this is your first time at the airport, you'll know exactly what to expect from the moment you join the line to the moment you walk toward your gate.
Getting Ready Before You Reach the Checkpoint
A smooth trip through security starts long before you hand over your ID. Most delays at the checkpoint come from things travelers could have handled at home or on the way to the airport.
Arrive With Time to Spare
Security wait times change by airport, day of the week, and time of day. A Tuesday afternoon at a regional airport might take ten minutes, while a holiday Friday at a major hub can take far longer. Airlines generally suggest arriving about two hours early for domestic flights and three hours early for international ones, and that buffer exists mostly because of security.
How you get to the airport matters more than people think. Circling for a parking spot, waiting on a remote lot shuttle, or hoping a ride-hail driver accepts your request during rush hour can quietly eat up the margin you planned. A pre-booked private airport transfer removes that uncertainty. Your driver arrives at a set time, takes you straight to your terminal's departure curb, and helps with your luggage, so you walk into the building on schedule and in a calm frame of mind.
Pack Your Carry-On With Screening in Mind
The way you pack your bag determines how quickly you get through the X-ray. A few habits make a real difference:
-
Keep liquids, aerosols, and gels in containers of 3.4 ounces (100 milliliters) or less, all inside one clear quart-size bag. This is the 3-1-1 rule, and it still applies in 2026 despite rumors that it was dropped.
-
Put that liquids bag and your laptop where you can reach them quickly, near the top or in an outer pocket.
-
Pack spare lithium batteries and power banks in your carry-on, not your checked bag.
-
Leave knives, firearms, and large tools at home or pack them according to the rules for checked luggage.
Working through an airport travel checklist the night before is the easiest way to catch a forgotten water bottle or a full-size shampoo before it becomes a problem at the belt.
What Happens at Airport Security, Step by Step
Here is the TSA security process in the order you'll actually experience it. Specific equipment varies from airport to airport, but the sequence stays the same.
Step 1: Find the Right Line
As you approach the checkpoint, you'll usually see separate entrances for standard screening, TSA PreCheck, and sometimes CLEAR or airline priority lanes. Signs above each lane make this clear, and a TSA officer is often stationed nearby to direct people. If you don't have PreCheck printed on your boarding pass, join the standard line.
Step 2: Show Your ID and Boarding Pass
At the front of the line, a TSA officer checks your identification. Since May 2025, adult travelers flying within the US need a REAL ID-compliant driver's license or another acceptable document, such as a US passport. Travelers who show up without one can go through an identity verification option called TSA ConfirmID, which carries a $45 fee, but it adds time and isn't guaranteed to work, so it's better not to rely on it.
At many airports, the officer scans your ID with a machine that confirms your flight details automatically, so you may not need to show your boarding pass at all. Some checkpoints also use a camera to match your face to your ID photo. You can decline the photo and ask for a manual ID check instead without losing your place in line.
Step 3: Load Your Belongings Into Bins
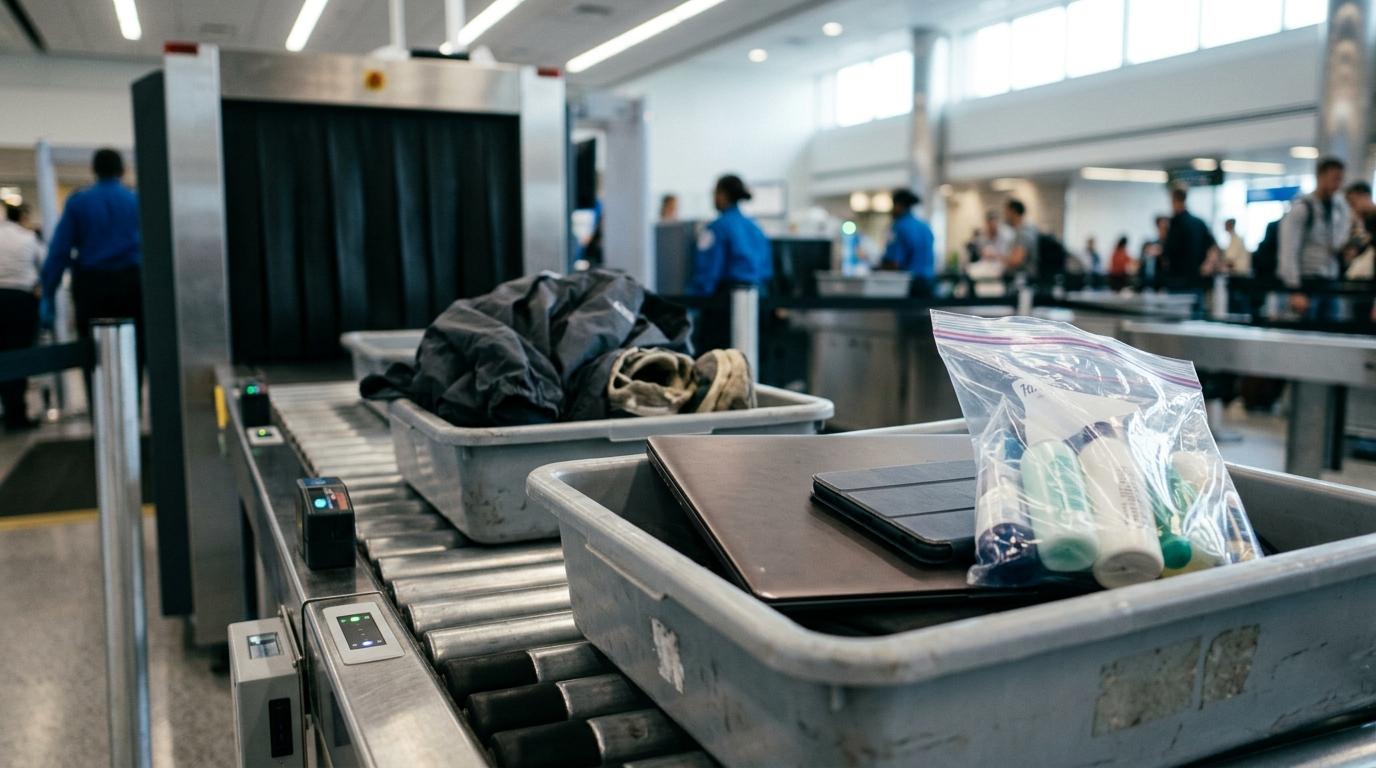
This is the part where lines tend to slow down. You'll move to a long table or automated lane with stacks of plastic bins. In a standard lane, you'll usually place the following items in bins:
-
Jackets, coats, and belts
-
Phones, keys, wallets, and anything else in your pockets
-
Your laptop, in its own bin, unless the lane uses a newer CT scanner
-
Your quart-size liquids bag, again unless signs say it can stay in your bag
You no longer need to take off your shoes in most standard lanes. That requirement ended in July 2025, although an officer may still ask you to remove them if they need a closer look.
Your carry-on bag and personal item go flat on the belt or in a bin behind your other belongings. Push everything forward, then step toward the scanner.
Step 4: Walk Through the Body Scanner or Metal Detector
Most large airports use an advanced imaging scanner, the booth where you stand still with your arms raised for a few seconds. It doesn't produce a detailed image of your body. Instead, the screen shows a generic outline and highlights any area that needs a second look. Some lanes use a traditional walk-through metal detector instead.
If you'd rather not go through the body scanner, you can tell the officer and request a pat-down instead.
Step 5: Your Bags Go Through the X-Ray
While you're being screened, your belongings pass through an X-ray or CT machine. An officer reviews the images on a monitor. If something looks unclear, your bag gets diverted to a separate area for a closer inspection. This doesn't mean you did anything wrong. Dense food items, tangled cables, and packed electronics often trigger a second look.
Step 6: Collect Your Things and Head to Your Gate
Once you clear the scanner and your bags come through, grab your belongings and move to the benches or tables past the belt to repack. Putting your shoes back on, threading your belt, and reorganizing your bag right at the end of the belt holds up everyone behind you. Step aside, take your time, and check that you have your ID, phone, and wallet before walking off.
What Happens If You're Selected for Additional Screening?
Extra screening is common and usually quick. It can happen because the body scanner flagged an area, your bag needed a closer look, or you were randomly selected.
If the scanner flags something, an officer will typically pat down that specific area. A full pat-down follows a standard procedure: the officer explains what they'll do before they do it, uses the backs of their hands on sensitive areas, and is the same gender as you. You can ask for the pat-down to take place in a private room and can bring a companion with you.
If your bag gets pulled, an officer will ask if it belongs to you and then search it, usually in front of you. They may swab your hands or items with a small cloth that gets tested for explosive residue. Most of these checks take a few minutes. Staying calm and answering questions directly helps everything move faster.
How Airport Security Procedures Have Changed Recently
A lot of advice online still describes the checkpoint as it was a few years ago. Here's what's different now.
Shoes stay on. The Department of Homeland Security ended the shoes-off requirement for standard screening in July 2025. Before that, only PreCheck travelers and certain age groups could keep their shoes on.
REAL ID is enforced. A standard license that isn't REAL ID-compliant no longer works on its own for domestic flights. Look for the star marking in the top corner of your license.
CT scanners are spreading. Many airports now use 3D CT scanners for carry-on bags. In those lanes, you can often leave your laptop and liquids inside your bag. Because not every lane has one, always follow the signs and the officer's instructions rather than assuming.
The liquids limit hasn't moved. Even in CT-equipped lanes where you don't have to pull out your liquids, the 3.4-ounce container limit still applies. Exceptions remain for medications, baby formula, and breast milk, which you should declare to the officer.
Airlines are tightening battery rules. Several US airlines now limit how many power banks you can carry on board, so check your airline's policy if you travel with more than one.
TSA PreCheck vs. Standard Screening
TSA PreCheck is a trusted traveler program that gives approved members access to a separate, usually faster lane. After a background check and an application fee, members can keep their belts and light jackets on and leave laptops and liquids in their bags regardless of which scanner the lane uses.
PreCheck makes the most sense for people who fly several times a year. If you travel once or twice a year, the standard lane works fine as long as you arrive with a reasonable buffer and pack well. Global Entry, which is aimed at international travelers, includes PreCheck benefits as well.
Tips for Families, Older Travelers, and Passengers Who Need Extra Help
Airport security procedures allow for different needs, but you'll have an easier time if you know your options before you arrive.
Traveling with kids. Children under 18 don't need ID for domestic flights when flying with an adult. Strollers and car seats go through the X-ray, so fold them before you reach the belt. Formula, breast milk, and baby food are allowed in larger amounts than the standard liquids limit; just tell the officer you have them.
Older travelers. If standing in the body scanner with your arms raised is difficult, let the officer know. They can screen you another way.
Travelers with disabilities or medical conditions. You can call TSA Cares at 855-787-2227 ahead of your flight to ask about screening or request a passenger support specialist at the checkpoint. Medical devices, wheelchairs, and mobility aids are screened without requiring you to leave them unless it's safe to do so.
For any of these groups, the trip to the airport sets the tone. Juggling car seats, walkers, or several suitcases on a crowded shuttle bus is exhausting before you even reach the terminal. A private car booked to fit your group, with room for gear and a driver who helps load it, means you arrive with your energy intact for the part of the trip that actually requires patience.
Why the Ride to the Airport Matters More Than You'd Think
Security lines are the one part of the airport you can't speed up yourself. What you can control is how much time and calm you bring with you when you join one.
Travelers who arrive rushed are the ones who forget to pull out their laptop, leave a phone in a bin, or panic when their bag gets pulled for a second look. Travelers who arrive with a cushion of time can handle a long line or an extra bag search without much stress.
That's where a private airport transfer earns its place in your plans. Booking through Transpovia lets you schedule a private car ahead of time, choose a vehicle that suits your group and luggage, and get dropped off right at your departure terminal. There's no parking garage to navigate, no shuttle to wait for, and no guessing whether a ride will show up when you need it. You can spend the drive double-checking your ID and boarding pass instead of watching the clock.
Frequently Asked Questions
How long does it take to get through airport security?
It depends heavily on the airport, the time of day, and the season. Some checkpoints take only a few minutes, while busy hubs during holidays and early mornings can take much longer. Many airports and the MyTSA app show estimated wait times, which can help you plan when to leave home.
What should I not do at airport security?
Avoid joking about weapons or threats, which officers take seriously. Don't pack full-size liquids, prohibited items, or loose lithium batteries in a way that forces a bag search. Try not to repack at the end of the belt where it blocks other travelers, and always follow the officer's instructions even if they differ from what you saw at another airport.
Do I have to go through the body scanner?
No. You can tell a TSA officer that you'd prefer not to use the advanced imaging scanner, and you'll receive a pat-down instead. If you set off an alarm in the scanner, though, you'll still need additional screening to resolve it before you can continue.
Conclusion
Airport security looks intimidating from the back of the line, but the process is predictable once you know the order: ID check, bins, scanner, X-ray, and repacking. Most of the frustration people feel comes from not knowing what's next or from arriving with too little time to absorb a delay.
Prepare your carry-on at home, bring a REAL ID-compliant document, and keep up with recent changes like the shoes-on policy and CT scanners. Then give yourself the most reliable start you can by planning your ride to the airport as carefully as your packing. When you arrive on time and unhurried, the checkpoint becomes just one more short step between you and your flight.
"The security line used to be the part of every trip I dreaded. Once I started booking a private car to the airport and showing up with time to spare, it became the easiest part of the morning."
— The kind of thing we often hear from travelers who stop rushing to the airport


