
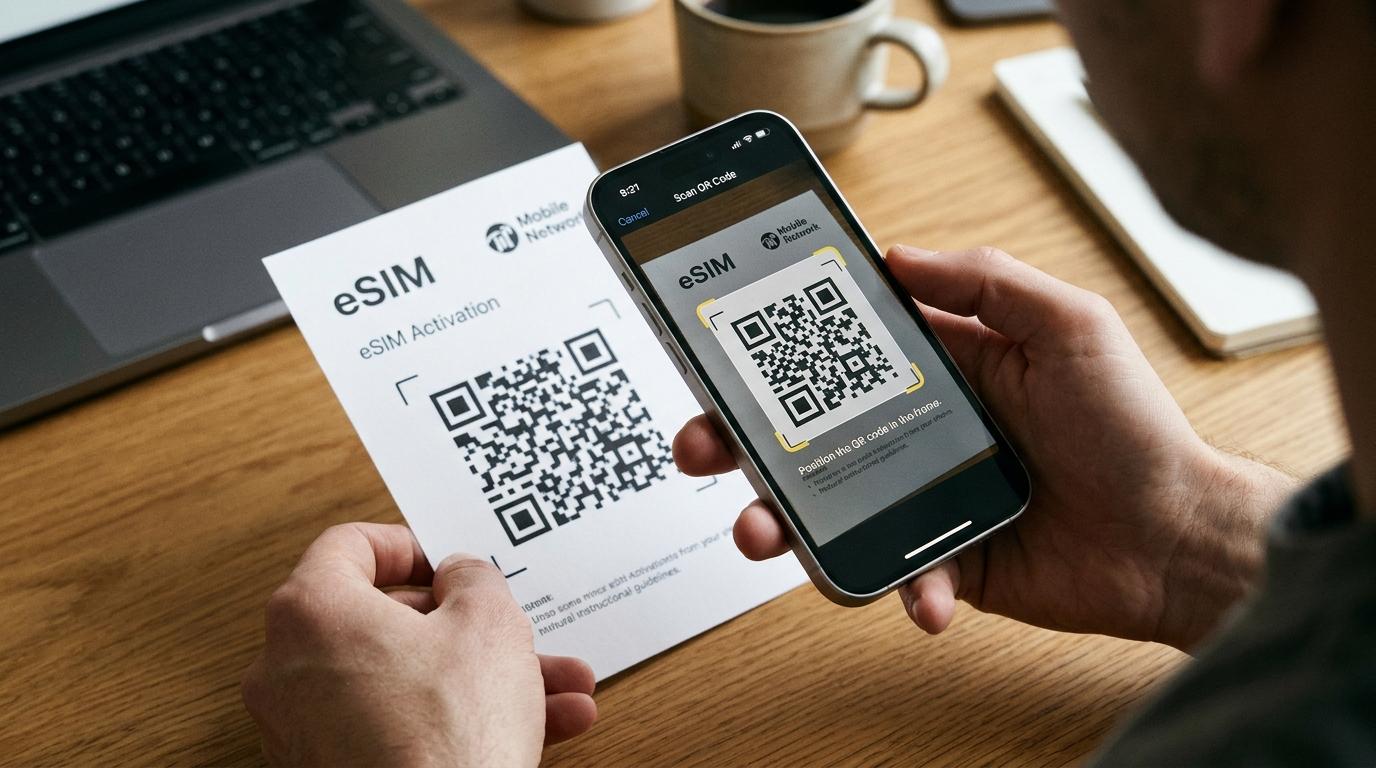
Your eSIM confirmation just landed in your inbox, along with a QR code and instructions that assume you already know your way around your iPhone's settings. If you're not sure what to tap first, or whether to do it now or after your flight, this guide shows you how to install eSIM on iPhone in plain terms. You'll check that your phone is ready, add the eSIM, switch it on when you land, and set things up so your regular carrier doesn't bill you for roaming.
The steps follow the current Settings layout in iOS 26. Older versions of iOS use the same basic path, though a few labels and prompts look slightly different.
Before You Start: Make Sure Your iPhone Is Ready
Most failed installs come down to one of three things: the phone doesn't support eSIM, it's locked to a carrier, or it has no internet connection during setup. Spend two minutes on these checks before you scan anything.
Check that your iPhone supports eSIM
Every iPhone from the iPhone XS, XS Max, and XR onward supports eSIM, including the second- and third-generation iPhone SE. iPhone 13 and later models can also keep two eSIMs active at the same time, which is what lets you run your home number and a travel plan side by side without a physical SIM.
The exact model and where it was sold still matter. iPhones sold in mainland China, for example, have historically shipped with dual physical SIM trays instead of eSIM, and only a few recent models there support it. If you bought your phone abroad or secondhand, confirm the specific model before you buy a plan. You'll find it under Settings > General > About.
Confirm your iPhone is unlocked
A carrier-locked iPhone will only accept that carrier's eSIMs, so a plan from another provider won't install or won't connect. To check, go to Settings > General > About and scroll to Carrier Lock. If it says "No SIM restrictions," you're good to go. If it shows anything else, contact your carrier about unlocking the phone before your trip, since the process can take a few days.
Get on Wi-Fi and update iOS
Your iPhone needs an internet connection to download the eSIM profile, so connect to stable Wi-Fi before you start. Updating to the latest iOS version is also worth doing at home. Newer versions add easier install options and clearer prompts for travel lines, and an update is the last thing you want to run over hotel Wi-Fi.
How to Install eSIM on iPhone With a QR Code
Scanning a QR code is still the most common way to add an eSIM, and it works on every eSIM-capable iPhone. Your provider will usually email the code or show it in your account. Display it on a laptop, tablet, or printout, because your iPhone's camera can't scan its own screen.
-
Open Settings and tap Cellular. In some regions this menu is called Mobile Service.
-
Tap Add eSIM. If your phone has no active line yet, the button may read Set Up Cellular instead.
-
Choose Use QR Code, then point the camera at the code until it's recognized.
-
Tap Continue, or Add Cellular Plan on older iOS versions, and wait while the profile downloads. This usually takes under a minute on good Wi-Fi.
-
Pick a label for the new line. Something like "Travel" or the destination name makes it easy to tell apart from your home number later.
-
Follow the prompts for your default line, iMessage and FaceTime, and cellular data. If you're installing before your trip, keep your home line as the default for everything for now.
Once you finish, the new eSIM appears in your list of SIMs under Settings > Cellular. Seeing it there means the iPhone eSIM setup worked, but it doesn't mean you have service yet. That part comes later.
One caution: many providers issue QR codes that can only be used once. Don't delete the eSIM afterward to "start fresh," because you may need a new code from support to get it back.
If the QR code is on your iPhone
If you only have your phone with you, you can skip the second screen. On iOS 17.4 or later, touch and hold the QR code in Mail or your browser, then tap Add eSIM. Some providers also send an installation link that opens the setup screen with one tap.
Other Ways to Add an eSIM to iPhone
QR codes aren't the only route. Depending on your provider, how to add eSIM to iPhone may look a little different.
Through the provider's app. Many travel eSIM companies have an app that installs the plan for you. You buy inside the app, tap an install button, and iOS shows its usual confirmation screens. It's quick, but you still need Wi-Fi while it runs.
By entering the details manually. If the QR code won't scan, look in your confirmation email for an SM-DP+ address and an activation code. Go to Settings > Cellular > Add eSIM > Use QR Code, then tap Enter Details Manually and type them in exactly as shown. A single wrong character will make the install fail, so copy and paste where you can.
By transferring your home number. eSIM Quick Transfer is for moving your existing number from an old iPhone to a new one, not for adding a travel plan. If you're getting a new iPhone right before a trip, handle that transfer first, then install the travel eSIM as a separate line.
Installing vs. Activating: Getting Service When You Land
Installing puts the eSIM profile on your phone. Activating is when the line connects to a network and your plan starts working. With many travel plans, the validity period begins the first time the eSIM connects in a supported country, so you can install at home without losing any days. Others start the clock at purchase or at installation. Your plan's terms will say which applies, and it's worth checking before you install weeks ahead.
To activate eSIM on iPhone once you arrive:
-
Go to Settings > Cellular and tap your travel line.
-
Turn on Turn On This Line if it's off.
-
Turn on Data Roaming for the travel line. This sounds wrong, but most travel eSIMs connect through partner networks abroad, so the phone treats the connection as roaming. You're billed by your eSIM provider, not your home carrier.
-
Go back, tap Cellular Data, and select the travel line.
-
Turn off Allow Cellular Data Switching so your iPhone doesn't quietly fall back to your home line when the signal dips.
Give the phone a minute to find a network. If the status bar shows signal bars and a 4G, LTE, or 5G icon next to your travel line, you're connected.
iOS 26 also recognizes many travel eSIMs as travel lines. When you return to your home country, your iPhone can switch the travel line off and turn your home line back on automatically. If that doesn't happen, check Settings > Cellular and make sure Turn On This Line is enabled for your primary number.
Settings That Prevent Surprise Roaming Charges
The travel eSIM only saves you money if your home line stays out of the way. The key setting is Data Roaming on your home line, not the line itself. Go to Settings > Cellular, tap your home number, and turn Data Roaming off. You can leave the line on so you still receive calls and texts, but keep in mind that answering calls or receiving SMS on your home number abroad may still be billed under your carrier's international rates.
A few other settings help a limited data plan last longer:
-
Low Data Mode on the travel line cuts background activity like automatic updates and photo syncing. Find it under Settings > Cellular > your travel line > Data Mode.
-
Back Up Over Cellular in iCloud can burn through gigabytes in one night. Turn it off under Settings > [your name] > iCloud > iCloud Backup.
-
iMessage and FaceTime stay tied to your home number even when data runs through the eSIM. Check Settings > Messages > Send & Receive to confirm your number is selected, and those apps keep working over the travel line's data.
If you'd rather not get any calls on your home number during the trip, you can turn the home line off entirely. Just remember to switch it back on when you get home.
When to Install Your iPhone Travel eSIM
The best time is a day or two before you leave, at home, on reliable Wi-Fi. If something goes wrong, you still have time to contact support or get a replacement code. Installing at the gate or after landing works too, but you'll be relying on airport Wi-Fi, which is often slow or behind a login page that needs a text message to your home number.
Installing ahead also means you're connected the moment you switch the line on. That matters when you need to message your driver, pull up a booking confirmation, or check a map before you leave the arrivals hall.
What to check in a plan before you buy
Not every eSIM works the same way, so a quick look at the plan details saves hassle later. Most travel plans are data-only, which means no local phone number for regular calls or SMS. You'd use WhatsApp, FaceTime, or similar apps instead. If you need a local number, look specifically for a plan that includes one.
Also check which countries and networks the plan covers, how long it stays valid, whether you can top up, and whether hotspot sharing is allowed. Some plans restrict tethering, which matters if you want to connect a laptop or a travel companion's phone. If you're still comparing options for your destination, start by browsing travel eSIM plans and matching the data allowance and validity to the length of your trip.
What to Do When Your eSIM Won't Install or Connect
Most problems fall into two groups: the eSIM won't install at all, or it's installed but shows No Service after you land. Work through the fixes in order.
The eSIM won't install
An error like "Unable to Complete Cellular Plan Change" or "This code is no longer valid" usually points to one of a few causes. Your Wi-Fi may have dropped mid-download, so connect to a stronger network and try again. The QR code may have already been used, which happens if you scanned it once and then deleted the eSIM. The phone may be carrier-locked, which you can confirm in Settings > General > About. If none of these explain it, contact your eSIM provider, since they can often reissue the profile.
The eSIM is installed but has no service
Start with the basics. Make sure Turn On This Line is enabled for the travel line, Data Roaming is on for it, and Cellular Data is set to it. Then switch Airplane Mode on for about 10 seconds and off again, which forces the phone to search for networks.
If you still have no signal, restart your iPhone. After that, try choosing a network yourself. Go to Settings > Cellular, tap the travel line, tap Network Selection, turn off Automatic, and pick one of the partner networks your provider lists for that country. Some providers also ask you to enter APN settings by hand. You'll find those details in your setup email or the provider's help pages.
Whatever you do, don't delete the eSIM while troubleshooting. Removing it rarely fixes a connection problem and may leave you unable to reinstall it.
Frequently Asked Questions
Can I install eSIM on iPhone without Wi-Fi?
You need some internet connection to download the eSIM profile, but it doesn't have to be Wi-Fi. If your home line has cellular data, you can usually install over that, or you can connect to another phone's personal hotspot. Apple notes that eSIM-only iPhone models can activate without Wi-Fi in some countries and regions. If you're abroad with no connection at all, find Wi-Fi first.
How many eSIMs can an iPhone hold?
An iPhone can store several eSIM profiles at once, and Apple says many models can hold eight or more. You can only use two lines at the same time, though. So you can keep eSIMs for different trips installed and switch on the one you need, as long as your home line plus one travel line is all you run at once.
Can I keep the same eSIM for my next trip?
Often, yes. If the plan is still valid or your provider lets you top up, you can leave the eSIM installed and turned off until you travel again. Once a plan has expired with no top-up option, it's just taking up a slot. You can remove it under Settings > Cellular by tapping the line and choosing Delete eSIM.
Conclusion
The actual install takes a few minutes. What makes the difference abroad is everything around it. Check that your iPhone is unlocked before you buy, install the eSIM at home where fixing a problem is easy, and keep in mind that an installed eSIM isn't the same as a working connection.
When you land, turn the travel line on, point cellular data at it, and switch off data roaming on your home number. Keep this eSIM setup guide handy for those first few minutes off the plane, and you'll be online before you reach the arrivals hall.
"I set it up on my couch the night before, flipped it on when the plane landed, and had maps working before I even got to baggage claim."


