
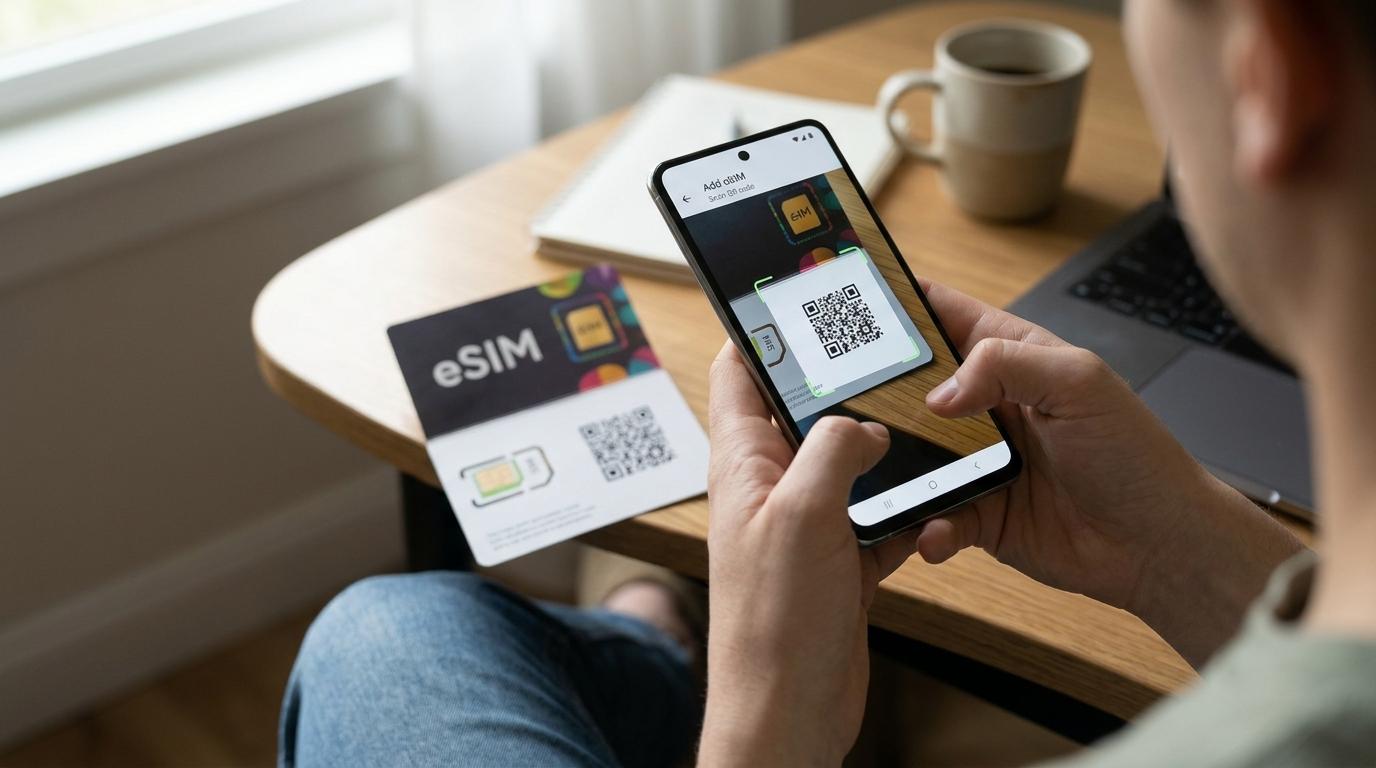
Your eSIM QR code is sitting in your inbox, your flight leaves in two days, and you're scrolling through Android settings with no idea where the option lives. Learning how to install eSIM on Android takes about five minutes once you know where Samsung, Google, and other brands put it. The trickier part is everything around the install: confirming your phone can use the eSIM at all, adding it at the right time, and switching on the right settings when you land. This guide covers each step in the order you'll actually need it.
Before You Start: Three Things to Check
Most failed installs come down to one of these three issues, so it's worth two minutes before you touch the QR code.
Your Phone Supports eSIM
Plenty of Android phones support eSIM, but not all of them, and support can depend on the exact model and the region it was sold in. The same phone name can ship with eSIM in one country and without it in another. The quickest check on many Android phones is to dial *#06#. If you see an EID (a long 32-digit number), your phone has eSIM hardware. You can also open Settings and search for "eSIM." If an option like Add eSIM, Download a SIM, or Add mobile plan shows up, you're in good shape.
Your Phone Is Carrier Unlocked
If you bought your phone through a carrier, especially on a payment plan, it may be locked to that carrier. A locked phone might refuse to add another provider's eSIM, or it might install the profile and then never connect. Your carrier can tell you your lock status and whether you qualify for an unlock. Sort this out before your trip, because unlock requests can take time to process.
You Have Wi-Fi and a Way to Scan the Code
Installing an eSIM downloads a profile to your phone, so you need a stable internet connection while you do it. You also can't point your phone's camera at a QR code displayed on that same phone. Open the code on a laptop or tablet, or print it. If that isn't possible, most providers also give you a manual activation code or an in-app install option, both covered below.
Installing vs. Activating: Why the Difference Matters
These two words get used interchangeably, but they mean different things for your trip. Installing is the step where your phone downloads the eSIM profile and adds it as a new line. Activating is when that line connects to a network and your plan starts working.
That difference matters because of plan validity. Many travel eSIM plans start their validity period when the eSIM first connects to a supported network at your destination. Others start counting from the moment of installation, or even purchase. Read your plan's terms before installing so you don't burn days of a seven-day plan while you're still at home.
It also explains why an eSIM can appear in your settings and still give you no signal. Having it installed doesn't guarantee service. The line needs to be turned on, set up for data, and within range of a network your plan covers.
When to Install Your eSIM
Once you've picked a travel eSIM for your destination, the best time to install it is at home, on your own Wi-Fi, a day or two before you fly. Airport Wi-Fi can be slow or require a login page, and fixing a stubborn install is far less stressful from your couch than from a baggage claim. If something goes wrong, you'll also have time to reach the provider's support team.
After installing, leave the eSIM line switched off until you arrive, unless your plan's instructions say otherwise. This keeps your phone from trying to use it early and helps you avoid starting the validity clock ahead of time.
How to Install eSIM on Android, Brand by Brand
Android menus vary by manufacturer and software version, so your screens may not match these steps word for word. The overall flow stays the same, though: open your SIM settings, choose to add an eSIM, scan the code, and confirm.
Samsung Galaxy
-
Open Settings and tap Connections.
-
Tap SIM manager (called SIM card manager on some older versions).
-
Tap Add eSIM. On older software, this may be labeled Add mobile plan.
-
Choose the option to scan a QR code from your service provider.
-
Scan the code and tap Confirm or Add when your phone asks.
-
Once it's added, give the line a clear name like "Travel" so you can tell it apart from your home SIM.
Google Pixel
-
Open Settings and tap Network & internet.
-
Tap the + icon next to SIMs.
-
Tap Download a SIM instead? and then Next.
-
Scan the QR code when the camera opens.
-
Tap Download and wait for the profile to finish installing.
-
When you're ready to use it, open the new SIM and switch on Use SIM.
Motorola, OnePlus, Xiaomi, and Other Android Phones
Other brands use their own wording, but the option usually sits under Settings, in a section named something like Network & internet, Mobile network, or SIM cards. Look for Add eSIM, Download a SIM, or Add mobile plan. If you can't find it, type "eSIM" into the search bar at the top of Settings. That's often faster than digging through menus.
Installing Without Scanning a QR Code
If you can't scan the code, look for a manual entry option during setup. On Pixel phones, it's under Need help? and then Enter it manually. On Samsung, the scan screen usually offers an option to enter an activation code instead. You'll need two details from your provider: the SM-DP+ address (the server your phone downloads the profile from) and the activation code. Some providers also offer a direct install button in their app, which handles everything without a code.
Turn On Your Android eSIM After You Land
This is the step travelers miss most often. Your eSIM is installed, the plane has landed, and the phone still shows no data. Here's what to switch on:
-
Turn on the eSIM line. Go back to your SIM settings and enable the travel eSIM.
-
Set it as your mobile data SIM. If you have two lines, tell your phone to use the eSIM for data. Samsung lists this under SIM manager, while Pixel phones have a Mobile data option under Network & internet.
-
Turn on data roaming for the eSIM. Many travel eSIMs connect through partner networks, so your phone treats them as roaming even though you're paying the eSIM provider, not your home carrier. If roaming is off, the eSIM may show signal but no internet.
-
Give it a minute. It can take a moment to register on a local network. If nothing happens, toggle airplane mode on and off or restart your phone.
To avoid surprise charges from your regular carrier, turn off data roaming on your home SIM specifically, or set mobile data to the eSIM only. Calls and texts on your home line can still carry roaming fees depending on your carrier's policy, so check that before your trip if you plan to keep it on.
Some plans also require you to enter an APN (Access Point Name), a setting that tells your phone how to reach the provider's data network. If your plan instructions list an APN, add it under your mobile network settings in the Access Point Names section.
Using Two SIMs at Once: Your Home Number and Your Travel Data
Most eSIM-capable Android phones support dual SIM use, meaning your physical SIM and the eSIM can be active together. Some newer models can also run two eSIMs. A common setup for travel is to use the eSIM for mobile data and keep your home SIM on for calls and texts, so you can still receive things like bank verification codes.
Keep in mind that many travel eSIMs are data-only. They don't come with a phone number, so you can't make regular calls or send standard texts on them. You can still use apps like WhatsApp, Google Meet, or other internet calling services over the eSIM's data connection. If you need a local number, check whether your plan includes calling and SMS before buying.
The same goes for hotspot use. Some eSIM plans allow you to share data with a laptop or a travel companion's phone, while others restrict it. If tethering matters to you, confirm it's included rather than assuming it is.
Troubleshooting Common Android eSIM Problems
The Add eSIM Option Is Missing
This usually means your phone model or regional variant doesn't support eSIM, your phone is carrier locked, or the software needs an update. Check for a system update first, then confirm your exact model number's eSIM support with the manufacturer or your carrier.
The QR Code Won't Scan or Shows an Error
Turn up the brightness on the screen showing the code, and make sure you're connected to Wi-Fi. If you get a message saying the code is invalid or already used, contact your provider. With many providers, a QR code works only once, so a previous failed attempt may have used it up.
The eSIM Is Installed but There's No Internet
Work through the after-landing checklist above: line turned on, set as the mobile data SIM, data roaming enabled. If all three are correct, try restarting your phone. Next, switch network selection from automatic to manual and pick one of the partner networks your plan lists. Finally, confirm you're in a country your plan actually covers.
You Deleted the eSIM by Accident
Don't scan the old QR code again and hope for the best. Many eSIM profiles can't be reinstalled once deleted, so reach out to your provider and explain what happened. They may be able to issue a replacement profile.
Frequently Asked Questions
Can I install an eSIM on Android without Wi-Fi?
You need some kind of internet connection, but it doesn't have to be Wi-Fi. Mobile data from your existing SIM also works for downloading the profile. Keep in mind that if you're already abroad, using your home SIM's data may trigger roaming charges, so Wi-Fi is usually the cheaper choice.
Will adding an eSIM remove my regular SIM card?
No. Installing an eSIM adds a new line alongside your physical SIM rather than replacing it. Your home number stays on your phone, and you choose which line handles data, calls, and texts. Many Android phones can store several eSIM profiles, though how many can be active at the same time depends on the model.
Can I move my travel eSIM to a new Android phone?
Usually not by yourself. Travel eSIM profiles are typically tied to the device they were first installed on. Some newer Android phones offer eSIM transfer tools, but support depends on the phone and the provider. If you're switching phones mid-trip, contact your eSIM provider to ask about a replacement profile before deleting anything from the old device.
Conclusion
The install itself is quick. Getting it right comes down to timing and a few settings. Check compatibility and unlock status first, install on home Wi-Fi before your trip, and save the activation for when you land. Once you're on the ground, the three switches that matter most are the eSIM line itself, mobile data, and data roaming.
If your eSIM still won't connect after that, the troubleshooting steps above cover the most common causes, and your provider's support team can handle the rest.
"I set it up the night before the flight, switched it on when the plane landed, and had maps and messages working before I even got to passport control."


